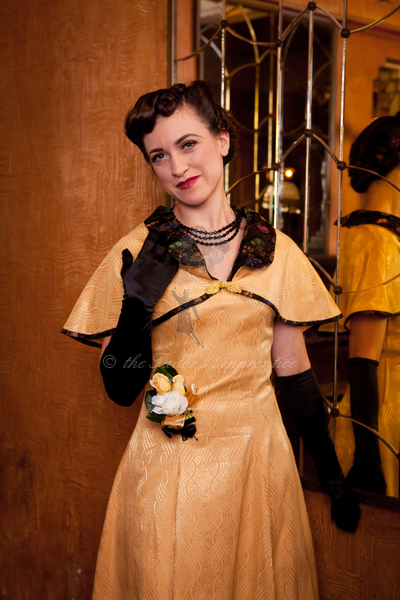
Showing posts with label WWI. Show all posts

Monday, February 17, 2014

Storm clouds over Europe AGWA weekend in Goulburn

My AANS Uniform
To start the centenary of WWI and Australia's participation in the 'war to end all wars' a group of us from the Australian Great War Association met in Goulburn, NSW from around Australia, Victoria, South Australian, Tasmania and NSW for a WW1 training weekend at the Old Gouburn Brewery - 14 - 16 Feb 14 (AIF) - "Storm clouds over Europe".

It was an open invitation to all WW1 groups and individuals, including Germans and local Lighthorse groups to come and participate in a range of training activities including drill and tactical displays and a photo shoot of a Casualty Clearing Station. The Goulburn brewery is a fascinating period venue (1830's) which looks a lot like a Belgian/French farm complex. Camping and accommodation was in period style rooms or in tents (our option).

The storm clouds were also over Goulburn, much to the pleasure of the locals because rain had been absent for most of summer. As the weather was very wet, it curtailed some activities such as the setting up of our outdoor casualty clearing station, instead we two nurses and medical officer sat and discussed all the things we would need to create an interesting and informative display in the future. While we did this, the men drilled!

Our bell tent was warm, dry and comfy, the amusing thing is that they are ex Girl Guide tents, so very familiar to J-L and I!
Apologies for the modern camping gear in the shot, I took this at the very beginning, then my phone batteries ran out!
Inside the tent, I felt like the nurses on Lemnos in their tents in bad weather, it really gave me a full appreciation of how hard it would have been to keep clean and neat for the wards.

On the friday night we went into the town for a dinner in full kit, I'm sure some people thought we nurses were nuns, lol!
J-L and I, she is building the persona of an Ambulance Officer along with my nurse persona.
Here's more of the group at Friday's dinner.
Myself and the other nurse, all the way from Tasmania! She is in the Walking Out dress and I am in the Ward Dress.
Myself and our commander, John organised this fabulous weekend. I am wearing the uniform created from my WWI AANS dressmaking pattern
Before going out on Friday night for dinner, more soldiers arrived on Saturday. In the afternoon on Saturday we had a series of talks on Australia in WWI, I gave a talk on the AANS and their uniform, which was politely received by all the blokes, LOL!
Mike Crowther presenting on WWI Australian soldiers
That evening was the Mess dinner.
 The meal was resplendent with our own Piper.
At the wonderful 1840s bar. Sadly blurred again, the champagne was obviously affecting my photography that night!
More of our dinners. Aren't the roof beams fabulous in this shot? All tongue and groove oak beams, work seldom seen today.
A final shot of our Piper. The weekend was great fun and inspiring. It would be great to have more nurse join our NSW troupe of the AGWA, if your interested in helping us demonstrate and display please contact me through the Tailor's Apprentice's contact page.


***********************************************************************************************

I'm The Tailor's Apprentice, maker of The Miss Page 1940s reproduction patterns, gowns developed from pattern pieces found amongst the remnants of Miss Violet Florence Page’s life and work. Affordable, elegant, and unique garments from the 1940s war years. 

All my patterns are available on Etsy and my website where you'll find out more about me as well. This year I am publishing an 1820s gown wardrobe pattern and an Australian Army Nurses Services WWI uniform pattern.


If you'd liked to be included on my mailing list for events, pattern release dates and interesting snippets about vintage and historic sewing, please subscribe to my Newsletter on The Tailor's Apprentice website.


Monday, November 11, 2013

Making my Veronica evening gown and capelet from my WWII pattern series: preparing the downloaded e-pattern

Veronica evening gown and capelet
A friend is having a 'wear something glamorous from any time period' NYE party and as my sewing commissions often keep me from sewing lovely things for me, I decided to set myself a challenge and make my Veronica evening gown and capelet from my WWII pattern series between now and then... and blog about it as I go.

Veronica was created from an extant WWI patten drafting book that came from Miss Page's personal sewing memorabilia. Miss Page is the inspiration for my vintage patterns as I am lucky to hold a small collection of her hand sewn vintage garments, sewing patterns, books and other memorabilia from her life as a dress maker in the Blue Mountains where I live.

Veronica is an example of mid-war pattern cut, when fabric restrictions and ration cards dictated what you could make. Its frugal with fabric, but still lovely and drapes divinely. The caplet provides an added dressy touch and keeps the chill off should you wander out to the verandah for a chat and rest from dancing.

The pattern comes in three PDFS, the e-pattern, the pattern notes and the 'How to put the pattern together' documents. When you buy it, you are sent all three immediately.

In this post I am showing you how to put your e-pattern together after you have printed it out.

How to print:
You can download the pattern to a memory stick and take it to a printer to print out on one, or more sheets ... or ... do what I do and print on my home printer.

When printing at home, set your printing scale to 100% or 'no scaling' to ensure the pattern prints correctly for you and your paper. Also print off page 1a, the test print page, first and check that your grid measures 1" x 1".

The pattern is designed to fit both A4 and 'Letter' size paper that most of us have in our home printers. Depending on the paper type you use, you may have white edges to trim so the pattern joins correctly. You can see that I need to do this on my Australian A4 paper in the left hand image above.

Why e-patterns?
I create e-patterns for many reasons. The first is that in Australia I can't get patterns printed at a cost that makes it possible to sell the pattern on to the customer. The second is that an e-pattern is immediate, you buy it, you receive it, you stick it together and you start creating. If your impatient like me, having to wait many weeks for a pattern to arrive through 'snail mail' is very frustrating. If I want to make it, I want to do it today! The third reason is that its better for the environment, patterns don't get printed until they are needed.

Let's put the pattern together:
Every The Tailor's Apprentice pattern page is clearly marked so joining it altogether is easy. A series of numbers and letters are used for each separate printed page, for example:

1a, 1b, 1c, 1d, 1e, 1f, 1g, 1h, 1i, 1j, 1k
2a, 2b, 2c, 2d, 2e, 2f, 2g, 2h, 2i, 2j, 2k
3a, 3b, 3c, 3d, 3e, 3f, 3g, 3h, 3i, 3j, 3k
4a, 4b, 4c, 4d, 4e, 4f, 4g, 4h, 4i, 4j, 4k
5a, 5b, 5c, 5d, 5e, 5f, 5g, 5h, 5i, 5j, 5k
6a, 6b, 6c, 6d, 6e, 6f, 6g, 6h, 6i, 6j, 6k
7a, 7b, 7c, 7d, 7e, 7f, 7g, 7h, 7i, 7j, 7k

This enables you to join each consecutive piece together row by row.

The first page, 1a, the test print page, also gives you the pattern layout so you can use this to follow the pattern layout on your bigger pattern pieces.

I use my cutting bench to piece the pattern together, others use a kitchen table, even the floor. Do whatever makes you the most comfortable. I slide the pattern over the edge as it grows. Piece the pattern pages together row by by row, ensuring that you check your 1" grid at page joins.
I sometimes fold the unwanted paper over rather than cutting it. Both methods work well. In the picture to the left you can see me setting up the second row of pattern pages.

Its exciting watching the pattern grow as you join it up.


Yes, sometimes, even with all your careful work you can go slightly out as I have in the picture on the left.

This is no big deal, I mark it on the pattern so I know to correct when I cut the dress out and I ensure I correct the error with the next pieces.

Adjust the pattern for YOUR body:
Finally the pattern is created and is ready to be altered to my specific body type. No commercial pattern is made to fit you or me, its based on a pattern sizing of a 'Ms Average, who only exists in a small part of the population. Most of us are different.

For example, the waist length on my patterns is 16", I'm 14.5" and always have to correct it by shortening it at the appropriate marking on the pattern. 'Ms Average' is also 5'6", I'm 5'4", so I have to shorten the hem considerably at the appropriate marking before cutting.

This saves time and fabric if you adjust the pattern now.

I need to take out 5" of the length at the Lengthen/Shorten line for the skirt length.

I fold up to the mark place, stick the pattern together.

Then draw a new skirt line at the sides to the correct angle and trim away the excess.  I do this for all pieces of the pattern. Doing this to the skirt hem length means I keep the drape of the original pattern around my feet. I keep all that lovely twirl factor.

Making the test dress (toile):
Next post we will walk through creating the toile to fit my curves. My body shape varies from a 16 to an 18 and I have compensated for this in the pattern before cutting the pieces, but a toile will ensure that I can tweak the changes, especially as I've lost some weight recently and that will affect the fit.


***********************************************************************************************

I'm The Tailor's Apprentice, maker of The Miss Page 1940s reproduction patterns, gowns developed from pattern pieces found amongst the remnants of Miss Violet Florence Page’s life and work. Affordable, elegant, and unique garments from the 1940s war years. 

All my patterns are available on Etsy and my website where you'll find out more about me as well. This year I am publishing an 1820s gown wardrobe pattern and an Australian Army Nurses Services WWI uniform pattern.


If you'd liked to be included on my mailing list for events, pattern release dates and interesting snippets about vintage and historic sewing, please subscribe to my Newsletter on The Tailor's Apprentice website.


Wednesday, April 24, 2013

An Australian WWI nurse's uniform - A visit to the Australian War Memorial

Photo from AANS Uniform & Service Requirements

I've been asked to create a pattern for the Australian WWI nurse's uniform, both the ward dress and the dress uniform. Some serious research was required and first stop was the interwebs and I found a number of examples, such as the one above, and have pinned them to my WWI board.

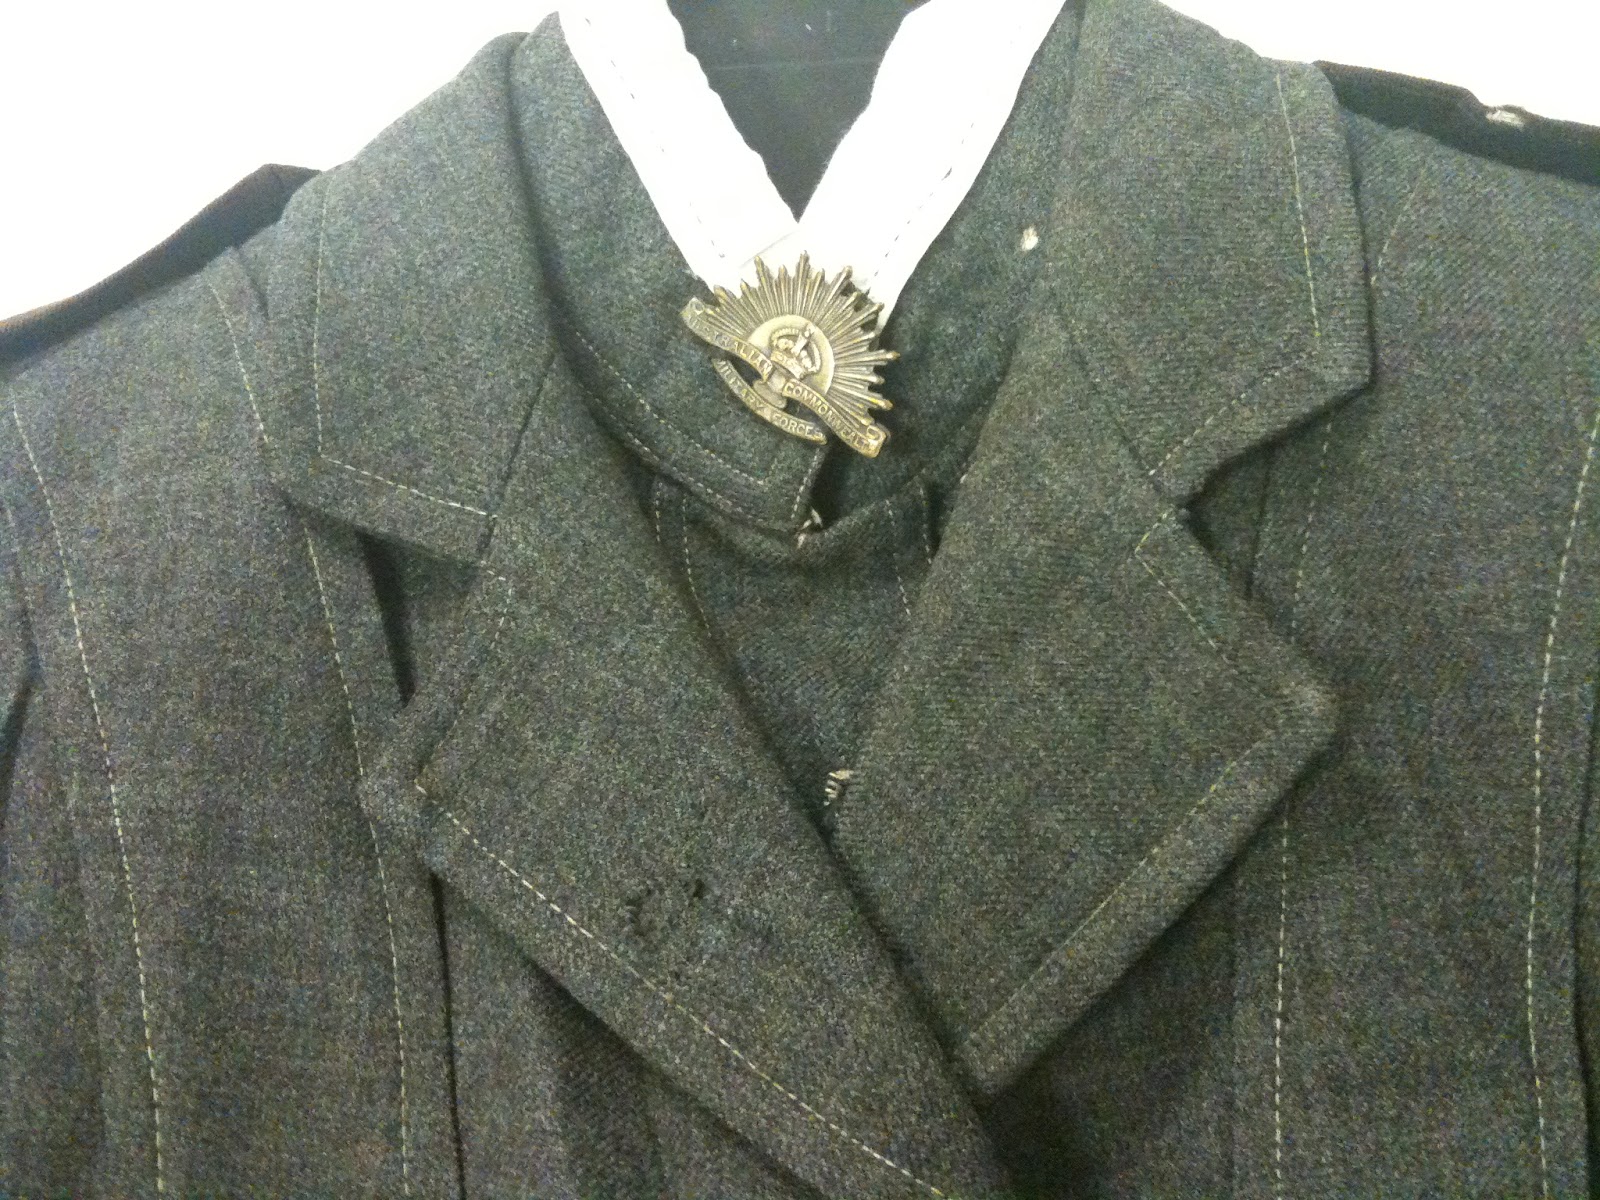
I then contacted the Australian War Memorial in Canberra and asked them what was available in their collection and if I could organise a visit as I was already there for the Jane Austen Festival Australia last weekend. Sadly there aren't many uniforms left and the AWM only had a Norfolk jacket and dickie of the dress uniform. Still n' all, they were marvellous and let me view it and take as many photos as I needed.

It was wonderful to see a uniform worn by a serving women who worked to heal soldiers injured in the battles. She would have worn her dress uniform with pride, and deservedly so!

The Australian Army Nurse Service (AANS) WWI outdoor uniforms changed during the war to adapt to changing fashions and I am very thankful to the AANS Uniform & Service Requirements for the following information.
P04233.0011914 Outdoor Dress
An ankle length grey serge dress with a long sleeved, loose fitting blouson bodice, a six gore skirt ( its more likely to be a 5 gore skirt) and a self fabric belt. ( noted that there are 3 horizontal tucks at mid calf level on the skirt). The bodice had a yoke at the back but not at the front. This was fastened with 5 buttons (in front) from the neck to the waist and the belt had two buttons. The stand collar and cuffs were edged with narrow, linen liners. On the right sleeve, just above the elbow there was a raised embroidered AANS Badge.
AANS Uniform & Service Requirements
As noted in the above quote, the first outdoor uniform jacket was based on a Gibson style shirtwaist. Then, it changed in 1916  to the very popular Norfolk jacket style, with a front dickie that shows as the undershirt. The jacket was also worn with the 5-6 gore skirt of the period, which started at ankle length and rose to mid-calf by the end of WWI. It is this later jacket that the AWM holds and is the one I saw.
P03253.004The 1916 Outdoor Dress
In 1916 the AANS Outdoor Dress was changed and army officer’s rank was given to all nurses. The outdoor uniform itself changed to a grey serge suit consisting of a Norfolk jacket and a 5 gore skirt.

Oxidized rank insignia and “AUSTRALIA” titles were worn on the shoulder straps of the jacket.
Army unit color patches were worn on the upper sleeves.

In working dress rank insignia was worn on shoulder straps of the red cape. Nurses who served in the forward hospitals on Lemnos during the Gallipoli campaign were awarded the Anzac “A” like other AIF veterans of the Dardanelles

On the 1916 Outdoor Jacket the shoulder straps were most commonly detachable and chocolate colored. On some photos the shoulder straps are clearly grey. AANS Uniform & Service Requirements
Images from my visit to the AWM
The garment was made in a beautiful grey flannel (wool) and lined in cotton. The jacket is machine stitched, with hand stitching for the silk collar of the dickie.


The curator was marvellous, extremely helpful and encouraging. It was a great visit and I have learned a great deal that will inform my pattern making for the client.

its a shame they didn't have a working uniform, but here are its details:
P07989.003Working Dress for the entire war
The Working Dress remained the same for the entire war, except for a slight shortening of the skirt to keep in line with the current fashion.
This was a grey zephyr cotton dress similar in pattern to the 1914 Outdoor Dress, with a detachable starched white collar (photos show both stand and stand-and-fall collars,) and cuffs.
White cotton armband with a red felt Geneva cross sewn in the centre. The armband is curved - wider at the centre and tapering to either end, forming straps. The band is fastened by a two-clawed metal buckle sewn into one end of the armband. 'A. [broad arrow symbol] S' is stamped on the back of the armband.
There was a starched white apron with a bib front and cross over straps at the back (this could also be unstarched grey zephyr for extremely dirty work). The apron sometimes had a cotton embroidered Red Cross center top. AANS Uniform & Service Requirements