Wednesday, January 30, 2013

1929 day dress for the Charleston Challenge 2013 in the Blue Mountains

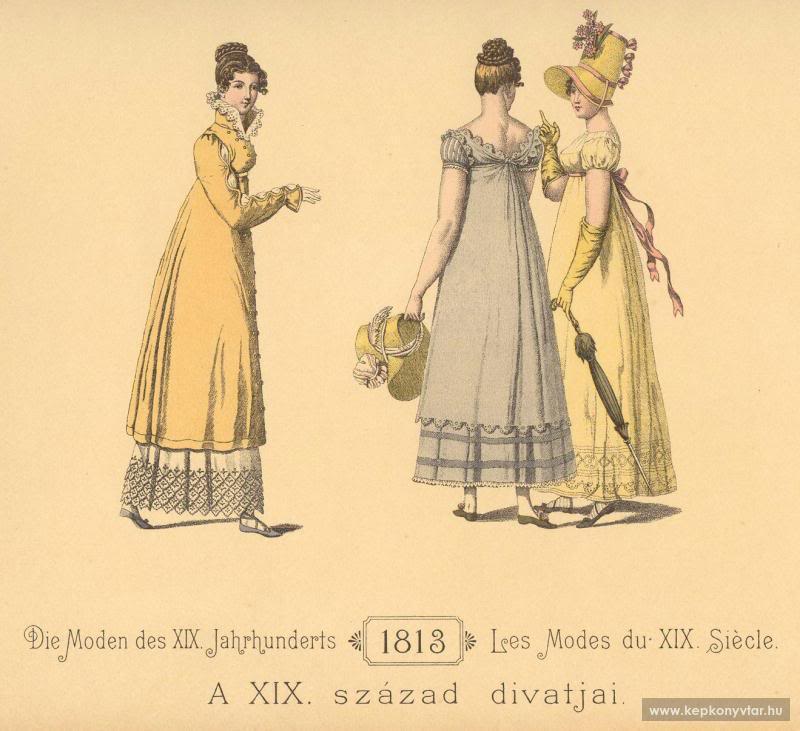
I need a new dress for the 2013 Charleston Challenge in the Blue Mountains, on the 3rd February. Now 20s fashion isn't my style, I'm a woman with hips and bust and the tube style does tend to make me look rather solid! However, I found this dress on Vintage Textiles through a Google search ...


... and then Koshka the Cat's interpretation further down the same search. I was inspired by the design and decided to give it a try with some changes. The thing I like about this gown is that it does have a fitted waist and I love the gathering for the bust darts on the bodice. Its heading into the 30s and the elements that will change the style completely to bias cut fitted gowns.

I have an original 1920s pattern that would give me the base for  gown, its a New Deltor Butterick pattern 2347.

 
I cut out the base dress, I used a blue and white pin stripe cotton for the bodice and a navy blue cotton  for the skirt, both soft to the hand so they would drape well. I was trying to give a 'separates' feel, yes, as you see, I am already diverging from the style. It also means that I have completed my Challenge #6 Stripes for the HSF!


  I draped a shawl sleeve/collar in the dark blue.
Then I took a further turn to the left ... I decided to leave the ruffles off! When I put the bias onto the shawl sleeves/collar I felt the whole outfit was 'busy enough' and ruffles weren't required.


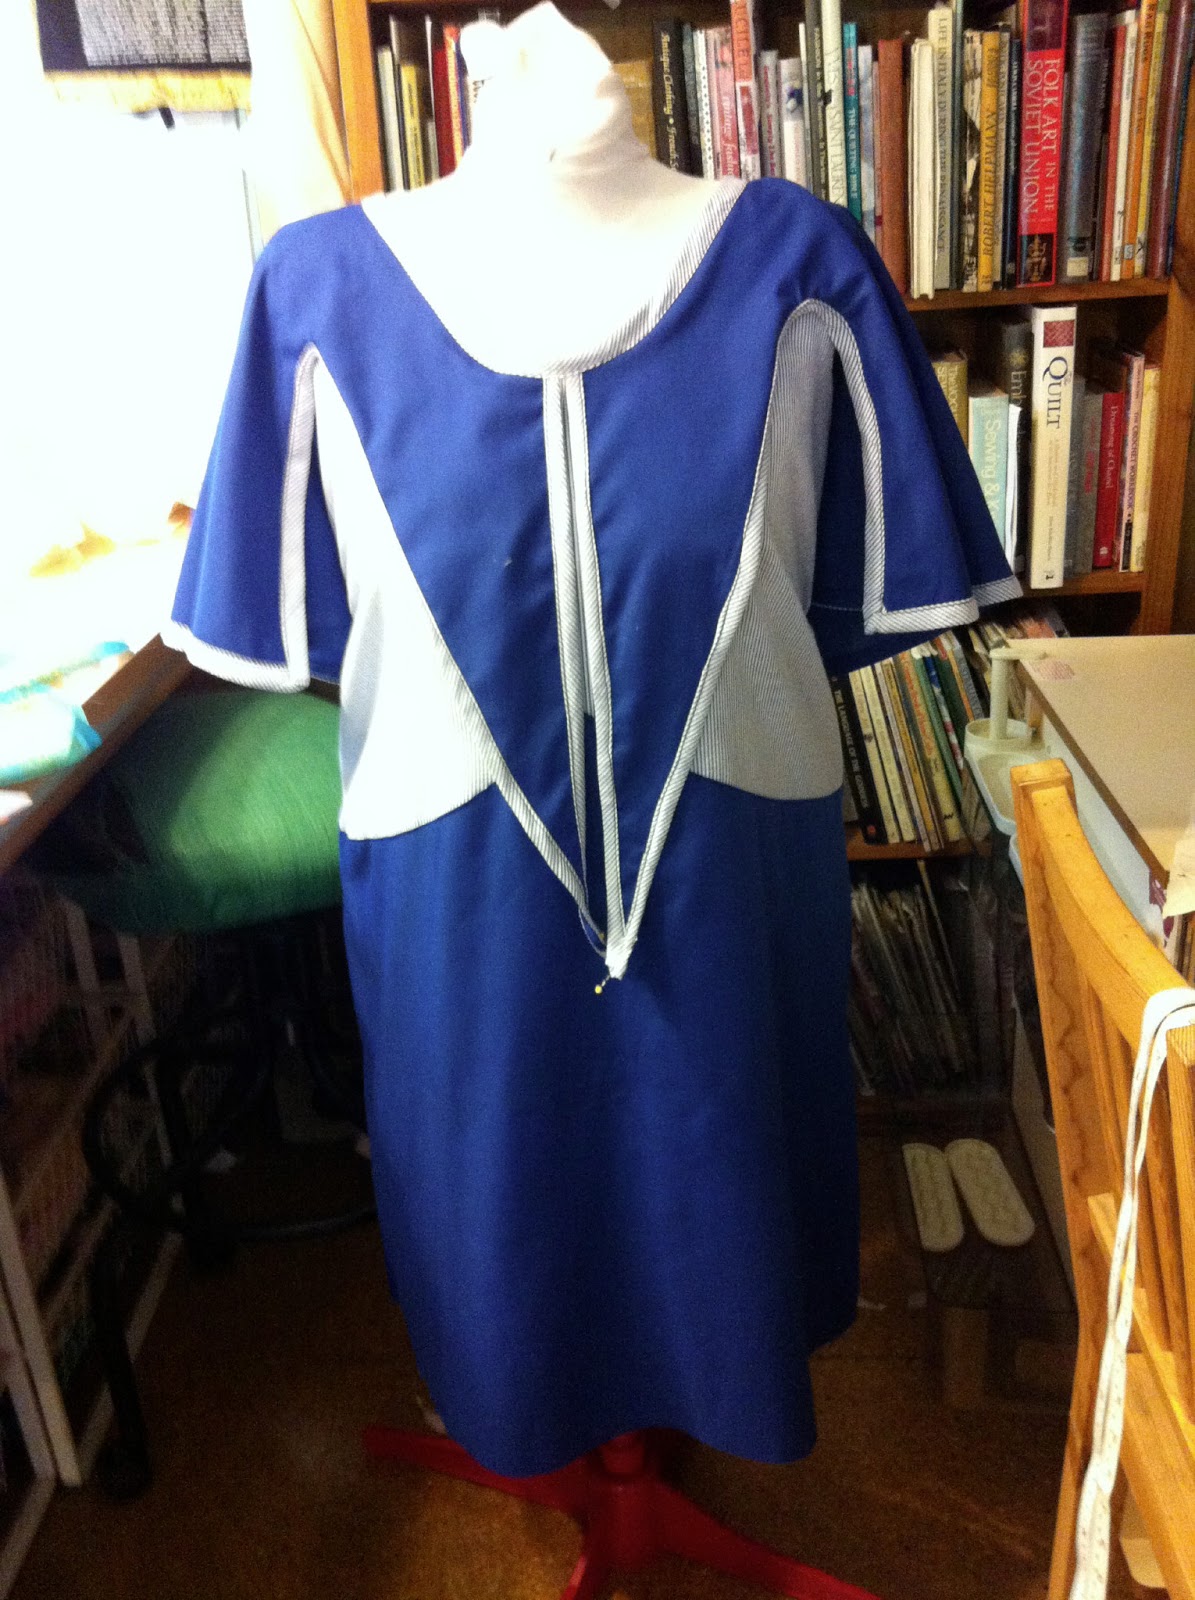
 I like the look of this dress, no its not a copy of an extant gown, but it does have the 20's feel that I wanted. It will be worn next Saturday for the Charleston Challenge in Leura. More photos of that event after we played!
Historical Sew Fortnightly
The Challenge: #6: Stripes - due March 25. The stripe is one of the oldest patterns, appearing in the earliest textile fragments and visual records of garments, and its never gone out of style since. Celebrate stripes with a striped garment. Will you go for grand baroque stripes, pastel rococo stripes, severe neoclassical stripes, elaborately pleated and bustled Victorian stripes, or something else entirely?


  • Fabric: Cotton seer sucker blue and white stripes  for the bodice and binding, dark blue cotton, both
    from my stash
  • Pattern: New Deltor Butterick pattern 2347 and pattern draping.
  • Year: 1920s no date on pattern and can't locate it on the interwebs so far.
  • Notions: Thread, sewing machine.
  • How historically accurate is it: Not too bad, the base dress is based exactly on the original pattern, the shawl sleeves/collar on the original 1929 dress from Vintage Textiles
  • Hours to complete: 8 solid hours, done over a few days.
  • First worn: 3rd February for the Roaring Twenties Charleston Challenge in Leura Mall in the blue Mountains, 2013
  • Total cost: None except my time, everything came from my stash.

I'm The Tailor's Apprentice and I have created The Miss Page Vintage Pattern Collection. 1940s WWII dress making patterns for the 21st century woman. Patterns created by me from my extant 1940s gowns. All my patterns are available on Etsy and my website where you'll find out more about me as well. This year I am publishing an 1820s gown wardrobe pattern.

Tuesday, January 29, 2013

Costuming, communication and crumpets

Kelly Blainey is The Business Writer. She has kindly offered to write a post on getting your message out in the costuming world. She has been communicating professionally for over ten years and specialises in helping small businesses attract the consumer and media attention they need to succeed. [ed: we are also good friends but I highly recommend Kelly's work! I shamelessly self promote my social comms via links throughout this piece!]]

Okay, I lied about the crumpets* to grab your attention, but this is important stuff. Communicating with existing and potential clients is crucial in any business, but if you work in costuming there are extra things you need to do to get your message out. 

Perhaps more than with any other product, your clients need to see what you’re offering. Whether you make bespoke gowns, sell costumes off the rack, run sewing classes or design vintage patterns, visual communication is essential to attract new clients and keep the old ones returning.

*Oh okay, I’ll wait while you go and get a nice cup of tea and some crumpets with honey.

Below is a list of the essential communication tools for every costuming business, combined with tips on how to best use them.

Your website
Your website is often the first point of contact for potential clients. It is your showroom; a chance to display and talk about your work. First impressions are almost more important in the online world than face-to-face. If a visitor doesn’t like what they see within the first 20 seconds of browsing your website, they will just pop over to your competition’s site and you will have lost them forever.

Websites need to tell visitors upfront who you are, what you do and how you can fulfil their needs. It must be easy for potential clients to find the information they are after, otherwise they will go and find it elsewhere. Websites can be more casual than printed promotional material – be sure to let your personality shine through in the text, design and images you use. [ed: The Tailor's Apprentice website]

Online gallery
A gallery of your work is essential. How will a client know they want a bespoke gown from you if they can’t see examples of your previous costumes? An online gallery is a chance to showcase your skills, creativity and professionalism.

Your gallery can be included on your website, or hosted on external sites such as Flickr or Pinterest. And a gallery doesn’t just mean still photographs. With the proliferation of web cams and mobile cameras, there’s no excuse for you not to have a YouTube channel, with videos embedded on your site. [ed: my Pinterest, my Flicker]

Use videos to introduce yourself and your passion, give a tour of your workspace or provide short tutorials to demonstrate your skills, giving potential clients enough information to know they want to work with you. [ed: My video]

Newsletters and blogs
Once you’ve sold a pattern, run a sewing class or made a costume, you’ll want to stay in touch with your clients. You need to provide them with enough interesting information that they will want to work with you again, but not so much that they delete any email with your name on it.

A monthly newsletter, delivered via email, is a great way to stay in touch. You can announce new classes, showcase your latest work and offer specials to return clients. Likewise, you may want to start a blog on your website, giving readers snippets of your work day and current projects. [ed: here's mine, come and sign on]

Give visitors to your website multiple ways to subscribe – via email or an RSS feed – so they can get your information in the way that suits them best.

Social media
Social media isn’t just about LOLcats. It’s a great way to network, stay in touch, and find out what other people are doing in your field.

There are dozens of social media clients, so I recommend starting with a simple Facebook page (not profile – that’s for personal stuff) and twitter feed [ed. here's mine Facebook: The Tailor's Apprentice, Twitter: StitchUpHistory] Social media is all about dialogue and relationship-building. If all you do is broadcast marketing messages you will quickly find yourself without any likes or followers. Using social media can bring you new clients, publicity and opportunities you otherwise wouldn’t have known about.

By using these communication tools you are well on your way to having a successful costuming business. If you have any questions or need a hand getting started, leave a comment below or feel free to get in touch.


Kelly Blainey is The Business Writer. She has been communicating professionally for over ten years and specialises in helping small businesses attract the consumer and media attention they need to succeed.

Wednesday, January 2, 2013

Historical Sew Fortnightly - #1 Challenge

A XIX. század divatjai. Collection Geszler. - Die Moden des XIX. Jahrhunderts
 #1: Bi/Tri/Quadri/Quin/Sex/Septi/Octo/Nona/Centennial – due 14 Jan.  Sew something from __13, whether it be 1913, 1613, or 13BC.

For challenge #1 for the Historical Sew Fortnightly I am creating the pattern and toile for the 1813 blue gown in the centre of the image on the left. This fits in nicely with my JAFA Costuming Challenge to create an 1813 gown for the Jane Austen Festival Australia in April this year to celebrate the bicentennial of Jane Austen's, Pride and Prejudice.

 Its nice to be able to complete two challenges with the same outfit, win win all round!

My lovely wife gave me 10 metres of blue silk taffeta for Christmas to make this gown and the pelisse on the left. I hope to also make the white dress under the pelisse and a version of the yellow gown on the right, but in a different colour, as yellow and I clash badly!

RESEARCH: 
Books:
  • Norah Waugh, The cut of women's clothes 1600-1930
  • Nancy Bradfield, Costume in detail 1730 - 1930
  • Sarah Jane Downing, Fashion in the time of Jane Austen
  • A XIX. század divatjai. Collection Geszler. - Die Moden des XIX. Jahrhunderts
  • Jean Hunnisett, Period costume for stage & screen: patterns for women's dress 1800-1909
  • Janet Arnold, Patterns of Fashion 1: Englishwomen's dresses and their construction c. 1660-1860
Interwebs:
I trawled the web like a madwoman and pinned the results to my 1813 Pinterest board.

THE TOILE:

I spent an afternoon draping my bodice. I decided to keep the same V-neck front and back as there were other European fashion drawings with front V-necks in 1813. Bodices were extremely high at this period in Europe, they sat at the underarm.

 The back:

I think I have the style, I pleated the centre back to get the ruched looked.

I created a mock trim and added a sleeve to get a better feel. 


The front:

Not sure I'm pleased with it, think I may add the back ruching.


Back to the research, I really want the bodice front depicted in the 1813 French gown below, supposedly the first wedding gown with veil depicted in the 19th century.

In Norah Waugh's The cut of women's clothes, I found a bodice that would work. The style is 1803, 10 years earlier, but it gives me the shape I am want and I can tweak it happily.

Here is my paper mock-up.

Here is my new design of the bodice and I'm much more satisfied with it.

Front

Back
This has been a hard fortnight for me, we have had a horrible heat wave in the Blue Mountains with extreme fire danger, not a happy occurrence in the Australian bush! Our bushfire plan is to leave, so our bags were packed, hardrives and laptops all ready to go quickly if we were threatened by fire. Thankfully this didn't occur for us, but it did for many others across NSW and my heart goes out to them. The Australian Red Cross is accepting donations to help the burnt out bushfire victims if you'd like to help and contribute.

The heat made me unmotivated, I hate high temps, they really knock me around. A cool change came through today so I restarted my 1813 bodice with the different pattern above and finished the toile, it works, but it's a pretty lame attempt for Challenge #1 as its not a completed item as I didn't drape the toile skirt, nor have I tried the bodice on with the correct underpinings. However it is the start of a beautiful 1813 gown and I will post further progress on this gown as I continue. 

I'm back at work tomorrow sewing commissions for others, so not sure which challenges I'll be able to work on, but I am here in spirit and admiring everyone's work. 

Just the facts, Ma’am: Aimed for a completed toile for an 1813 full dress gown. Didn't succeed, only managed the bodice.

Fabric: Calico in my stash.

Pattern: A pattern created by Norah Waugh from an extant gown in 1803

Year: 1813 AD

Notions: Thread and pins.

How historically accurate is it? As accurate as I can make it, based on an extant pattern and adapted to fi my figure and the image.

First worn: Not yet.

Total cost: "free' as I used stash fabric, books from my library and notions also in my stash.

I'm The Tailor's Apprentice and I have created The Miss Page Vintage Pattern Collection. 1940s WWII dress making patterns for the 21st century woman. Patterns created by me from my extant 1940s gowns. All my patterns are available on Etsy and my website where you'll find out more about me as well. This year I am publishing an 1820s gown wardrobe pattern.

Tuesday, January 1, 2013

Historical Sew Fortnightly #0 - Regency drawers or pantelletes

The history of underclothes. p113
The Historical Sew Fortnightly being run by the Dreamstress has begun with a pre-challenge of doing something simple. I am running late as I sprained my ankle on Boxing Day clambering over rocks, opps! So today, two days late, I hobbled (is that sounding pathetic enough?) up to the studio and created a pair of simple drawers.

I usually go without drawers in my Regency reenactments, they were rather risque in the period after all, better to wear nothing at all LOL! Some of my recent gowns however, particular my white sheer muslin, have been too sheer, I have felt rather too 'exposed' so I have been wearing my 1850s pantelletes.

"Drawers came into fashion about 1806. and were first made along the lines of the masculine article, the waistband drawn together by back lacing. The leg was either tubular or drawn into a band below the knee." Willet, C and Cunnington, Phillis. The history of underclothes. 1992, p.112.
Stockinette drawers were very popular for women as they provided warmth and modesty while appearing fashionable. I'm also sure they were comfy and practical.

My drawers are very simple, I made the following style ...
"In some cases the two legs were constructed as separate items, [but] were inadequately held in place ..."
"... My finest dimity pair with real Swiss lace is quite useless to me for I lost one leg and did not deem it proper to pick it up, and so walked off leaving it in the street behind me and the lace had cost me 6 shillings a yard. I saw that mean Mrs Spring wearing it last week in a tucker ..." Willet, C and Cunnington, Phillis. The history of underclothes. 1992, p. 114
 ... so to save myself the embarrassment of the lady above, I attached a drawstring waistband. 

I used a basic pants pattern to get the shape, stitched up two leg tubes, joined the front pants with a short seam. I used french seams throughout. Next I attached the waist band, no falling legs for me, I threaded it with a blue ribbon which will be changed for white.

They feel comfy and work well, though stockinette would be even more comfy. It took about 4 hours all up. Here are the piccies.

Front

Side
Back
Front showing the split
Back showing split