Monday, October 24, 2011

The 1890s ~ the bloomers and the blouses (shirtwaist)

Laughing Moon ~ Women's Sporting Outfit created by me
I've enjoyed dabbling in the 1890's for the last few months, creating outfits for the Festival of Walking.

I wanted to replicate the outfits worn by women at the end of the 19th century, they were pushing gender boundaries, climbing mountains, bush walking, riding their bicycles and joining the workforce in unprecedented numbers.

Throughout the 19th century women had been refuting the role of 'feeble' and by the end of the century, women were moving into the spheres of men, agitating for the vote and their clothing reflected these changes. 

The outfit above is a replica of a women's sporting outfit, it's bloomers (trousers) were being worn by the 'new woman'.

“The New Woman” was the term used to describe the modern woman who broke with convention by working outside the home, or eschewed the traditional role of wife and mother, or became politically active in the woman’s suffrage movement or other social issues. The New Woman saw herself as the equal of men and the bicycle helped her assert herself as such. 

If she wasn't wearing the new, and thought by many as outrageous, bloomers, she was dressing in a very masculine fashion. 

Simple A line skirts and culottes, the blouse (shirtwaist), a totally new innovation, often worn with a tie and 'mannish' jackets and short boleros. 

She learnt short hand and typing, became an office worker, earnt her own money and moved out into the world. Women's liberation was on the move!


Monday, September 19, 2011

Walking into History - 1890s walking outfit from your wardrobe or second hand shop

As part of the inaugural Festival of Walking Blue Mountains, Oberon, Lithgow Tourism, I'm hosting two walks, both will be held on the weekend of the 8th - 9th October and my theme is 'walking through time'. Images of the history walkers taken by Elizabeth Walton

Our wonderful trails attract walkers from all around the world and it was no different in the 19th century. The beauties of The Three Sisters, Mount Solitary, Leura Cascades, Wentworth Falls, The Valley of the Waters, called men and women from the smoky cities to picnic, walk, climb and explore in the fresh mountain air.  

But, what shall I wear?

"What shall we wear?" is a query rising from every channel of woman's life: for upon each occasion we must be suitably clad to enjoy its peculiar benefits.

From The Ladies Standard Magazine, April 1894, p. 98.
  
The basic walking costume for the 1890s 
The lady and gentleman below provide an excellent example of an elegant and practical 1890s walking ensemble. 


Lady: a long ankle length skirt of wool, silk or linen, a long sleeved white blouse in cotton or silk with leg-o-mutton sleeves, a wide belt leather or cloth, a tie, a fitted jacket in wool, silk or linen also with leg-o-mutton sleeves, a hat, stout walking shoes/boots. Under this she would have a chemise, corset, bloomers, a minimum of one full length petticoat, stockings of wool, silk or cotton with garters. 

If she was a Reform Dresser she might wear knee length voluminous trousers, or a split skirt [culottes] and would dispense with the corset.

 Gentleman: a three piece suit, either of linen or wool, often tweed, a long sleeved white shirt, a tie or cravat, a hat, stout walking shoes/boots. To be seen without your jacket regardless of the heat wasn't done, it would be like walking around in your underwear today. Underneath he would wear wool combinations, socks of wool, silk or cotton with garters.

 You can replicate this look with ease from your wardrobe and/or local second hand shop. 

The Woman:
  • Skirt: look for an ankle length A-line or gathered black or dark coloured skirt, wool, linen or cotton, but a man-made fiber is fine if that's all you can find. For Reform Dress choose a knee length gathered skirt.
  • Jacket: a short suit jacket to match or tone with your skirt, wool, linen or cotton, but a man-made fiber.
  • Shirt: a high necked white or light coloured office shirt, pin stripes are an excellent choice, ensure your shirt has long sleeves, cuffs, a stiff collar. 
  • Belt: a wide waist belt, leather or vinyl or fabric, choose a dark colour, a man's cummerbund is ideal.
  • Tie: A man's bow or long tie, or a piece of ribbon to tie in a bow at the neck.
  • Stockings: Over the knee cotton or wool socks, garters will help hold them up
  • Petticoat: another ankle length skirt works well, it will give you volume and a swish as you walk
  • Corset, chemise, bloomers: wear a sports or comfortable bra, undies and a singlet/spenser/modern chemise
  • Shoes: lace-up enclosed shoes, school shoe style are perfect, as are Doc Martens style, a small heel is fine
  • Hat: A boater is perfect but not easy to find, a wide brimmed straw hat will work just as well, you can decorate with artificial flowers and ribbons to make it more festive.
  • Gloves: A lady wouldn't be seen without them, white cotton gloves are fine
  • Parasol: A modern umbrella can be used, keep to dark somber colours, or white and lacy.
  • Hanky: A hanky to mop your 'glow' from your forehead
  • Pocketbook: a small handbag to carry your money, hanky, smelling salts, notebook, pencil and Eau de Cologne
The Gentleman:
  • Suit: A three piece suit, the suit you wear to work would be fine, add a vest if it doesn't have one. If you want to hunt for something in your local second hand shop look for a three piece suit, jacket, vest and trousers, tweed or linen would be perfect.
  • Shirt: an white office shirt, long sleeved, cuffed, stiff collar
  • Tie: A bow tie, long tie or cravat, choose plain colours
  • Underwear: stay modern, but you could wear wool or silk thermals if you have them, these replicate woolen combinations.
  • Socks: wool, silk, cotton socks, men wore sock garters, to replicate this, tie your socks up with ribbons
  • Shoes: lace-up enclosed shoes, school shoe style are perfect, as are Doc Martens style 
  • Hat: A boater is perfect but not easy to find, a panama, fedora or an Akubra work well.
  • Hanky: A hanky to pass to a lady in need

If you follow these guidelines you can outfit yourself well and walk through history with me on the 8th and 9th October as part of the inaugural Festival of Walking Blue Mountains, Oberon, Lithgow Tourism

1890s woman mountaineer


Perfectly attired for the outdoors


Monday, July 18, 2011

Sharpe's March Australia 2011

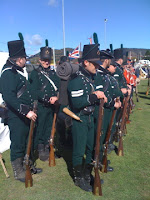
On Friday 15th July 2011, five intrepid Napoleonic re-enactors and our support crew of three, set off on an 80 km walk around Canberra working in partnership with The Sharpe's Children Foundation, who aim to help bring stability and education to the lives of orphaned children in the Third World.

This charity walk is an Australian first, but one we hope to continue. Re-enactors in England have been marching for many years for this cause.

We walked for three days in Napoleonic clothing around the cycle paths and walk ways of Canberra, averaging about 27 kms per day. 

We raised over $A600 and we are still collecting as our aim is to raise $A1000, we'd love your donation. 

So the highlights are (thanks Alex for this):
  • March completed without fatalities, arrests but our bodies are letting us know that we did walk.
  • The weather was perfect. Not too hot, not too cold. It was decided that a March in September (to bring it into alignment with the UK) would only lead to heat illness incidents.
  • Stopped by police 4km before the end but they were quite nice about it. We even got a photo of them with us and let us continue on our hobbling way.
  • Over $608 (£369.94raised.
  • Saw a magpie grab 2 mice on the path in front of us, fly off with 1 and his mate flew in and grabbed the other. No-one had ever seen that before.
  • Saw people using hired Segways around Lake Burley Griffin and HAD to have a photo opportunity. Just to note that I did NOT use the Segway for the March. : )
  • Saw a very large rat swimming in the lake.
  • On the third day we were commenting how we hadn't seen any weird things that day. That's when we passed a large, purple waterbottle in the shape of a dildo.................
  • Everyone was awesome and we had a great time, no matter how sore we were.
  • Planning for the next March is beginning................
 Walkers
Wonderful people who gave up three days to support a fabulous cause, strangers at first, we built camaraderie as we marched and are now firm friends.
  • John
  • Alex - who organised the event through the English Sharpes March group
  • Nick - who played bagpipes to keep our hearts light and out feet marching - Nick and Ricarda are the band Wayward
  • Ricarda - who played hurdy gurdy and sang to keep our hearts light and out feet marching
  • Lorna - The Tailor's Apprentice


Support team
Without them we would have starved and been thirsty.  They provided nourishing food and drink in plenty, they put up the signs and pulled them down, they took us to the start point and returned us home and then fed us again. They were fabulous!
  • Deanne
  • Jenny-Lee
  • Jim
 What is the Sharpe's Children Foundation?
"There are over 200 million children destitute on the streets of The Third World. Every three minutes a child under the age of 5 dies of malnutrition. Incredibly, the world stands by and little is being done. The Sharpe’s Children Foundation believes
that education is the strongest world currency and the only lasting and durable weapon against child poverty and deprivation.

By establishing Sharpe’s Shelters early education centres - the first will be in Rajasthan, India - the actors of Sharpe feel they have found a unique way to make a real difference to the lives of destitute and forgotten street children. The Sharpe's Children Foundation are showing the world what can be done with very little. It begins with us, change can only begin in the moment we begin to see and feel and understand." (home page of The Sharpes Children Foundation)

Wednesday, June 8, 2011

A steampunk jacket for Winter Magic 2011


1899 jacket
Winter Magic is our Blue Mountains winter solstice festival and dressing up is an essential element of the day.


I've made my bustle skirt already, I used this fabulous tutorial The Incredibly Easy Bustle Skirt, as always, I adapted the method and the look and I intend to do a post about it after Winter Magic.


This year, my inspiration was a European jacket from 1899 which shows the very heavy military influence in women’s clothing during the last few years of the 19th century, perfect for my SteamPunk personna. 

I used my Laughing Moon Saloon Girl jacket pattern as the base for my adaptation. I've made the pattern up before, it works well, fits well and goes together quickly. The jacket is boned which means it sits well and I won't need a corset if I choose not to wear one.

This is another stash project and I found the most beautiful black wool hiding there, Georgio Armani no less! I bought it from Tessutti's bargain table a few years back, its perfect for the project. The lining is a shot green silk I found in a second hand shop. The photo doesn't do justice to either I'm afraid.


The original Laughing Moon pattern has a low neckline and three quarter sleeves, I adapted it to accommodate a Mandarin collar and lengthened the sleeves. The jacket will be black with red braid and details.

First stage:
I cut out the three fabrics, wool, silk and cotton interlining and stitched all together. Its great not to have to fit the jacket as the pattern adaptations were made last time I made it up, that really helps in a 'quick-quick' project like this.

I interlined the black wool to give it more body as the fabric has such a soft hand, a bit of a shame I know, but I wanted the jacket to have the military stiffness of much heavier wool.

The project came to a stop as I had no boning or braid in my stash.

Stage two:
The Queen's Birthday long weekend and gave me a chance to get on with my project. 

I added the boning channels and inserted my cable tie 'bones'. Steel is recommended in the pattern but I find them too unforgiving and prefer the whale 'bone' feel of cable ties. 

I eased in the sleeves in both jacket and and lining, added shoulder pads to give a more military feel and then stitched in the lining.


I wanted a high military style collar so drafted one up and tested it with a toile and it worked very well, most pleased. This will be in scarlet wool, along with the sleeve cuffs.

The Georgio Armani wool was beautiful to stitch and has a glorious sheen, the photos do not do it justice.

I wanted to wear this jacket to Winter Magic, I had the collar to add, fastenings and the braiding to 'pimp' it up.


Final stage: Pimp up
 Front before pimping


Back before pimping


I was going to use braid to decorate the jacket, but that meant a trip to the shops and the weather was dull and very wet, so did not leave home.

I used the red wool to make trim for the jacket, I think it works well and gives the 'uniform' feel that I was after and the gold sun buttons look well against both red and black.


Unfortunately I have gained a bit of weight since I last made this pattern up and closing the jacket is a tad difficult. So, I replaced the smaller black placket which is meant to be hidden, with a much wider red one that displays down the front, and that did the trick!

I hand stitched down all the trims and the jacket was finished for Winter Magic. 

Sam on the left and me on the right, I should have worn my corset!

Sunday, June 5, 2011

Underpinings make the gown

Regency chemise and corset/stays
Underpinnings make your gown, if you want to look period correct, you need to wear the underwear of that period as well.

We live in a time were our body's own shape creates the look of the outwear, we wear a minimum of underthings, bra, knickers, tights, maybe a spenser if its cold. We like to ensure that our underwear is invisible, the 'panty line' look is avoided at all costs. But in the 20th, 19th, 18th, 17th, centuries and beyond, the underpinings were the basis for the shape of your look. Without them you won't look right in your 19th C Regency gown or your 18th C polonaise or your 16th C Tudor gown.

On ABC's Radio National today I listened to Fashion in the fifties. Diane Masters was a fashion model, or a mannequin as they were called then, one of a generation of professional models who were photographed by the leading image-makers of the day in Australia; Helmut Newton and Athol Shmith. She discussed the importance of underpinings to the look of the gown, the bra shape, the step-ins (corsets), the petticoats, all worked to create the desired shape that the fashion designer was after.

So if you want the right look, start from the inside out, below are the underpinings for the early Regency:

Regency chemise

Back of corset/stays

Front of corset stays, these give the 'shelf' look that was fashionable'

Petticoat

Ensure your outwear works!
Back of gown

So, if your still reading, get the right underpinings for the right period and don't mix and match them either :)

Sunday, May 22, 2011

An Italian Renaissance 1440s man's outfit.

Blog note: Sadly I chose a too early period so couldn't enter the inaugural challenge. 

I did, however, make most of the 1440s man's outfit, but have yet to blog about it, I will, when I get more time :) 

In the interim I have entered the 2012 challenge, and been accepted, and you can follow my progress here.

I was a late entrant to The Italian Renaissance Costuming Challenge, I took the place of a withdrawn entry. Sadly, as I did not read the rules correctly (a very bad habit I have!) and I had to withdraw from the challenge.

I chose a period that was too early sadly :) 

However, all is not lost, I still intend to make this and to send it to The Realm of Venus for the Italian Showcase once it is complete.  My challenge to myself is to complete this by the end of August.

I will update as I go. (Ed note: oops, fail!)

To celebrate the 10th anniversary Bella has issued a challenge to create a complete outfit in four months from the skin out. Details are on here : The Italian Renaissance Costuming Challenge. The competition started on the 21st April and its now the 22nd of May, so I am going to have to move my sewing stumps!  The competition ends on the August 21,  2011

Bio: I've been sewing since I was five, I was taught to sew by my mum who taught me the way she was taught, so consequently I have a repertoire of vintage and historical sewing techniques in my tool box. I've been costuming for the last 10 years, I am a member of the SCA, Dismal Fogs, though not very active, and I play in later time periods as well, mostly Regency, SteamPunk and 1940s. 


"Pope Celestine III (c.1106-98) Grants Autonomy to the Hospital of Siena"
Project: My partner needs an outfit to fit her male personna for the Italian Renaissance. I am working on recreating, the elegant young man in blue above. He is taken from Domenico di Bartolo's "Pope Celestine III (c.1106-98) Grants Autonomy to the Hospital of Siena".

I will be making a camica, mutande, farsetto, calze, giornea, and, hopefully, a mantello, but that might be pushing my luck!

Friday, May 20, 2011

The learning curve in creating a history dress range

I'm working on the development of an historical dress pattern range, starting in the 1940s. I've never had anything to do with the rag trade industry, I'm a home dressmaker and teacher, so everything is new and interesting.

I thought others would be interested in the process, so here are the steps.

1. Find a good pattern maker
The first step is to find a pattern maker. I'd already drafted my patten from a Miss Page dress. I searched the interwebs and researched and found one to test the waters with. We met, discussed the project and the process.

The pattern maker creates the first pattern from your design (a pattern is a bonus for them). You get an industry size 10 pattern to test. I made this up as a toile, fitted my model, sent the modifications off. Then the changes are incorporated, a new pattern sent and then this cycle continues until you are satisfied that it's exactly the way you want it to be.

The first change is included, each one after that costs extra.

Once the size 10 model is ready, the pattern maker then creates all the sizes in your range, in my case 8 - 20. Then I test all of these, which means making up the dress over and over again in each size and fitting onto size appropriate models, noting changes and required adjustments. If you can do this yourself it is much more cost affective.

Once all is agreed to, then your pattern is turned into a commercial nested pattern with all the appropriate markings for the home dressmaker.

2. Create your pattern notes
As I made up each model I created my pattern notes. These then get passed to others to use and test and ensure that they make sense. Bad pattern notes can ruin a good pattern.

3. Test, test, test!
When all is tested, rewritten as required, tweaked and smoothed to perfection, then your ready to think about pattern production.

That's where I am now!


- Posted using BlogPress from my iPhone

Sunday, May 8, 2011

Making a Regency long sleeved Pelisse


I made myself a long sleeved Regency Pelisse or Redingote (coat) last week to keep me warm and cozy at IronFest in Lithgow where the Battle of Lithgow was fought valiantly by Bonaparte's troops and our brave 95th (Rifle) Regiment of Foot, 2nd Battalion (Australia)

The 2011 IronFest theme was SteamPunk and Regency is much earlier I know, but as my partner and I both missed out on the Jane Austen Festival Australia the week before Easter as our sweet dog Astro was lost by his carer, well, we are going to be time travellers and wear our Regency garb!

1807 Redingote
I based my Redingote on the image to the right,  an 1807 Redingote--walking dress with silk and mohair ottoman Kashmir wool shawl from the Kent State University Museum. I love the rich colour of this coat, it is glorious, I wish I had such beautiful fabric in my stash. I love the bands at the bottom and the belt detail.

Mystery purple and green trim
I used a deep purple 'mystery' fabric that I bought a few years back in a second hand shop, it feels like wool, but doesn't pass the burn test, still an all, I have enough of it and that's the deciding factor. The green velvet trim is left over from a Burgundian I made a few years back, its lush upholstery cotton velvet. The lining is a greeny gold
Lining

I used the Sense and Sensibility Pelisse pattern as the basis for my Redingote and tweaked it to match these images, mostly.

This blog post is dedicated to @SuzieWong66 who suggested I discuss my process.

It took me two full work days and a couple of nights to complete the redingote, well to a wearable stage, when I wore it on Saturday it was sans buttons, back belt, wrist tabs and two ribbon bands!

Stage 1 - The bodice lining:
The lovely 1807 Redingote has a cross breasted bodice, similar to the dress styles of the same period, I did intend to do this, but a 'more haste less speed' error had me cutting out the collared pattern and not adapting it, which is a shame, because this one is so different, but my next one will use this detail.

I like Sense and Sensibility patterns, they are well researched and they fit me well, I know if I cut it out I won't need to do any adjustments and I no longer need to make a toile. So when I put together my bodice lining and the armholes were too tight, I couldn't understand it, I trimmed them down and continued on my merry way, only to discover that I had put the back bodice together upside down! As I said earlier "more haste less speed"

Back bodice lining - incorrect
Stitching the darts.
I didn't realise however until I had the sleeves on, a huge do'h moment! As it was the lining, it caused few issues, and its a good lesson in paying attention, even experienced tailors make silly errors and thankfully this one didn't cause any problems. Having made the mistake with the lining bodice, I ensured the fashion fabric was put together correctly. The bodice went together well as you can see from the photos.


The sleeves fitted like a dream once I had the back panel correct, nothing like a bit of frog stitching in a 'quick quick' project to make you concentrate!

Stage 2: The skirts:
Adding the skirts is the easiest part of all, they are just gathered rectangles of fabric. I used the back skirt pattern from Sense and Sensibilities Elegant Ladies Closet as it gives a lovely back drape and a small train, which is indeed very elegant. 

I added the bottom velvet band trim first, its easier to handle so much fabric without a bodice attached. I wanted three, but needed to fiddle with the green velvet and so ended up with one. I usually hand stitch all outside pieces but I didn't have time. Thankfully the cotton velvet is very thick and the machine stitches were lost in the pile.

I then stitched the lining to the skirt fronts.

The only difficult part of the skirt is ensuring that both the lining and fashion fabric are evenly gathered and then attaching all that gathered fabric to the bodice. When I have so much fabric to gather I do it in smaller sections, in this instance in quarters and I gathered the lining and fashion fabrics separately.

Also, I always hand tack difficult pieces together, this ensures that everything is in the right place before machine stitching and less chance of a broken needle in a thick and difficult bit of seam as well, both my fabrics were quite thick, especially the mystery purple.

Hand stitching bodice to skirt
Once the skirts were attached I could then hide the seams and gathering with the bodice lining and so the redingote looks good both inside and out.

Stage three: Hand sewing
To get my redingote ready for the weekend, I needed to hem the skirts and the sleeves and this was easily done listening to a fabulous Renaissance concert on ABC Classic FM.
Stitching lining to sleeve


Stage 4: Wearing it at IronFest 
95th (Rifle) Regiment of Foot, 2nd Battalion (Australia)
I was so glad I made my redingote, a wool shawl would not have cut the freezing weather at Lithgow! I didn't have time to do the buttonholes, so I used a broach to keep it closed.

The day was fabulous, IronFest is always a blast, but even better when you get into the excitement of it all and join the re-enactors.